10 Steps to Clean Your Push Mower Carburetor
To clean your push mower carburetor effectively, it’s essential to follow a step-by-step process to ensure optimal performance and longevity of your mower. Regular maintenance, including cleaning the carburetor, helps prevent engine problems caused by clogged jets and dirty passages.
This guide will walk you through the 10 essential steps to clean your push mower carburetor safely and efficiently.
Start by draining old gas outdoors while wearing gloves and eye protection to stay safe. Disconnect the spark plug to avoid accidental starts. Carefully remove the carburetor, taking note of fuel line and linkage positions for reassembly.
Use carburetor spray and a small brush to clean jets, passages, and the float bowl thoroughly. Inspect for worn parts like gaskets or the float valve.
Reassemble everything securely, reconnect fuel lines, then test the mower’s performance.
Following these steps closely will keep your mower running smoothly and help catch any issues early before they become major problems.
Key Takeaways
- Disconnect spark plug wire and remove the carburetor by loosening screws and detaching fuel lines and linkages carefully.
- Drain old fuel safely in a well-ventilated area using a proper container and wear gloves and eye protection.
- Disassemble the carburetor, removing the float bowl and internal parts while noting the positions of components.
- Clean all carburetor passages with spray cleaner and a small wire brush, inspecting for blockages and replacing worn parts.
- Reassemble the carburetor, reconnect fuel lines and linkages, then test and start the mower, adjusting choke and throttle as needed.
Why Cleaning Your Push Mower Carburetor Matters
One key reason to clean your push mower carburetor is to keep your engine running smoothly. When dirt or debris builds up inside, it can block fuel flow, causing your mower to stall or run unevenly. You don’t want to struggle with a mower that sputters or won’t start because of a clogged carburetor.
Regular cleaning guarantees that fuel mixes properly with air, which is essential for efficient combustion. By maintaining a clean carburetor, you also extend your mower’s lifespan and avoid costly repairs. Neglecting this task can lead to poor performance, wasted fuel, and frustration during mowing.
Taking care of your carburetor means your mower will be ready whenever you need it, saving you time and hassle in the long run.
Gather Tools to Clean Your Push Mower Carburetor
Keeping your carburetor clean guarantees your mower runs smoothly, but to get started, you’ll need the right tools on hand. First, gather a socket wrench set and screwdrivers—both flathead and Phillips—since you’ll remove various screws and bolts. Have a carburetor cleaner spray ready to dissolve deposits effectively.
A small wire brush or toothbrush helps scrub away stubborn grime. Don’t forget safety gear like gloves and eye protection to keep you safe from chemicals and debris. You’ll also want a clean container or tray to hold small parts, preventing loss during disassembly.
Finally, keep some clean rags or paper towels nearby for wiping parts and spills. Having these tools assembled before you start will make the process smooth and efficient.
Drain Old Gas From the Fuel Tank Safely
Before you drain old gas from your mower’s tank, pick a well-ventilated spot away from flames or sparks. Use an appropriate fuel container designed for gasoline to avoid spills. Always follow safety steps to protect yourself and the environment during the process.
Choose Proper Drain Location
Selecting the right spot to drain old gas from your mower’s fuel tank is essential for safety and environmental reasons. Choose a well-ventilated outdoor area away from open flames, sparks, or electrical equipment to prevent fire hazards. Make sure the ground surface is non-porous, like concrete or asphalt, so any accidental spills can be easily cleaned up without seeping into soil or water sources.
Avoid draining near storm drains, gardens, or water bodies since gasoline can contaminate them. It’s best to pick a flat, stable location to keep your mower steady, reducing the risk of tipping or spilling. By carefully selecting your drain spot, you protect yourself, others, and the environment while making the task safer and more manageable.
Use Suitable Fuel Container
You’ll need a suitable fuel container to safely drain old gas from your mower’s tank. Choose a container specifically designed for fuel storage—these are made from materials that resist corrosion and prevent leaks. Avoid using regular plastic or glass containers, as they might not be safe or durable enough.
Make sure the container has a secure, tight-fitting lid to prevent spills and fumes from escaping. Before draining, position your container close to the mower to minimize the risk of spills. Use a funnel or a siphon pump to transfer the gas smoothly into the container.
Label the container clearly if you plan to store the gas for future use. Properly using a suitable fuel container helps keep your workspace clean and prevents environmental hazards.
Follow Safety Precautions
When draining old gas from your mower’s fuel tank, it’s crucial to take proper safety precautions to avoid spills, fires, or harmful fumes. First, make sure you’re working outside or in a well-ventilated area to prevent inhaling dangerous fumes. Avoid smoking or using open flames nearby.
Use a proper fuel container designed for gasoline to catch the old gas, preventing leaks and environmental hazards. Wear gloves and safety goggles to protect your skin and eyes from contact. Drain the fuel slowly and carefully to minimize spills.
After draining, securely close the fuel container and store it in a cool, dry place away from children and heat sources. Finally, clean any spilled gas immediately with an absorbent material to avoid accidents.
Disconnect the Spark Plug for Safety
Before you start working on your push mower, disconnecting the spark plug is essential to avoid accidental starts. Locate the spark plug wire, usually a thick black cord attached to the top of the engine. Firmly grasp the boot—the rubbery part covering the spark plug—and pull it off.
Avoid pulling the wire itself to prevent damage. Once disconnected, secure the wire away from the plug to guarantee it doesn’t accidentally reconnect while you work. This simple step eliminates the risk of the engine unexpectedly turning on, protecting you from injury.
Always treat the spark plug connection with care, and don’t skip this safety precaution. Now that the spark plug is safely disconnected, you’re ready to proceed with cleaning the carburetor without any risk of the mower starting unexpectedly.
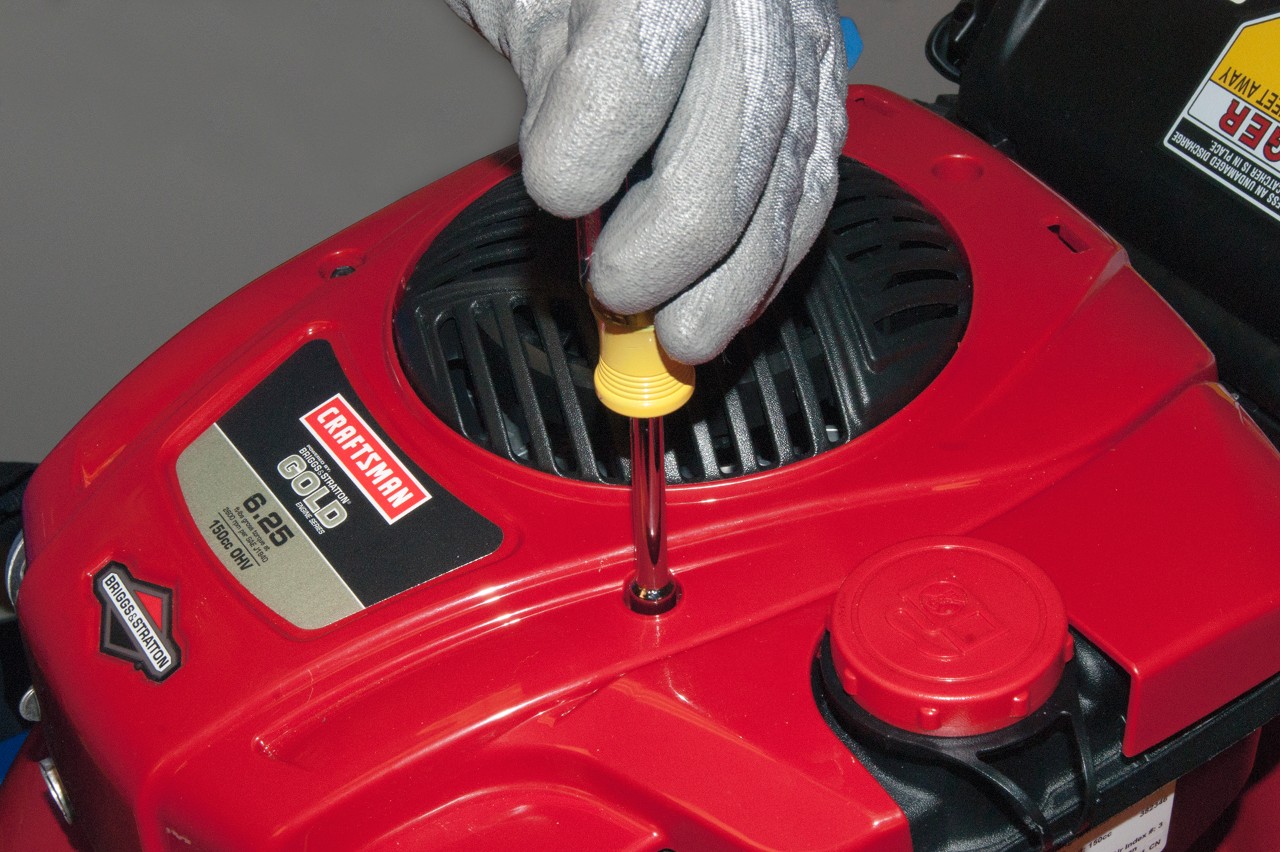
Remove the Push Mower Carburetor
Since the spark plug is safely disconnected, you can now focus on removing the carburetor. Start by locating the carburetor attached to the engine. Carefully loosen the screws or bolts holding it in place, and disconnect any fuel lines or linkages.
Keep track of each part to guarantee smooth reassembly later.
| Step | Tool Needed | Tip |
|---|---|---|
| Loosen screws | Wrench/screwdriver | Turn counterclockwise gently |
| Disconnect fuel line | Pliers | Clamp fuel line to avoid spillage |
| Remove linkages | Needle-nose pliers | Note their positions |
| Lift carburetor | Hands | Handle with care to avoid damage |
Once removed, place the carburetor on a clean surface, ready for the next step.
Disassemble Carburetor Components for Deep Cleaning
With the carburetor safely removed and set on a clean surface, you’re ready to take it apart for a thorough cleaning. Start by carefully loosening the screws and bolts that hold the carburetor body together. Keep track of each component as you remove it to avoid confusion during reassembly.
Here’s a simple approach to disassemble the carburetor:
- Remove the float bowl by unscrewing the retaining screws, exposing the internal components.
- Detach the float and needle valve gently, noting their positions for correct reinstallation.
- Separate the throttle and choke linkages carefully, avoiding bending or damaging any parts.
Clean Carburetor Jets, Passages, and Float Bowl
Now that you’ve taken apart the carburetor, it’s time to clean the jets and fuel passages to guarantee smooth fuel flow. Don’t forget to service the float bowl, which can collect debris and cause clogs.
Taking these steps will help your mower run efficiently and prevent future issues.
Cleaning Carburetor Jets
How do you guarantee your mower runs smoothly after cleaning the carburetor? A key step is thoroughly cleaning the carburetor jets. These tiny nozzles control fuel flow, so any blockage can cause poor engine performance.
To clean the jets effectively:
- Remove the jets carefully with a screwdriver, noting their position.
- Soak them in a carburetor cleaner for about 20 minutes to dissolve deposits.
- Use compressed air or a fine wire to clear any stubborn clogging.
Make sure you handle the jets gently to avoid damage. Once cleaned, reinstall them exactly as they were. Properly cleaned jets ensure the right fuel mixture, helping your mower start easily and run efficiently every time.
Clearing Fuel Passages
After cleaning the carburetor jets, the next step is to clear the fuel passages and the float bowl. Use a can of compressed air or carburetor cleaner spray to blow through every tiny passage, removing any dirt, varnish, or debris blocking fuel flow. Make certain to direct the spray through all openings, including the inlet, outlet, and vent holes.
Avoid damaging delicate parts by using gentle pressure. Inspect each passage visually to verify it’s fully clear. If needed, use a thin wire or specialized carburetor cleaning tool to dislodge stubborn clogs carefully.
Properly clearing these passages is vital for smooth fuel delivery and engine performance. Don’t skip this step before moving on to servicing the float bowl to prevent further blockages.
Servicing The Float Bowl
One essential step in servicing your push mower’s carburetor is cleaning the float bowl, along with the jets and passages connected to it. The float bowl holds fuel and regulates its flow, so keeping it clean ensures proper engine performance.
Here’s how to tackle this task:
- Remove the float bowl: Unscrew it carefully to avoid damaging the gasket.
- Clean the jets and passages: Use a thin wire or carburetor cleaner spray to clear any clogs or debris.
- Inspect and clean the float: Check for damage or fuel residue, then wipe it down gently before reassembling.
Check and Replace Worn Carburetor Parts as Needed
Since your push mower’s performance depends heavily on the condition of its carburetor parts, you’ll want to carefully inspect each component for wear or damage. Check the gaskets for cracks or brittleness, as damaged gaskets can cause air leaks that disrupt fuel flow. Examine the needle valve and seat for signs of wear or debris buildup, since these control fuel entry and need to seal properly.
Look over the float for any cracks or fuel absorption, which can affect fuel regulation. If you notice any worn or damaged parts, replace them promptly with compatible replacements to guarantee your mower runs smoothly. Keeping these parts in good shape prevents fuel leaks and uneven engine operation, helping maintain prime mower performance.
Reinstall the Carburetor and Reconnect Fuel Lines
Once you’ve replaced any worn carburetor parts, you’re ready to put the carburetor back onto your mower. Start by positioning it carefully onto the engine mounting. Make sure it aligns perfectly with the intake manifold to avoid leaks.
Next, follow these steps to reinstall and reconnect:
- Secure the carburetor with the mounting bolts, tightening them evenly to prevent warping.
- Reattach the fuel lines, ensuring each hose fits snugly over its respective nipple to avoid fuel leaks.
- Reconnect any throttle or choke linkages you removed, confirming they move freely without binding.
Test Your Push Mower After Cleaning the Carburetor
Once you’ve reinstalled the carburetor and reconnected the fuel lines, start your mower to see if it fires up smoothly. Pay close attention to how the engine runs and listen for any unusual sounds or hesitations.
If you notice performance issues, it might mean the carburetor needs another cleaning or adjustment.
Start Engine Smoothly
Although you’ve just finished cleaning the carburetor, you’ll want to make certain your push mower starts smoothly and runs properly before you begin mowing. To do this, follow these steps:
- Prime the Engine: Press the primer bulb a few times to ensure fuel reaches the carburetor quickly. This helps prevent hard starting.
- Set the Choke Correctly: Start with the choke fully closed to enrich the fuel mixture, then gradually open it as the engine warms up.
- Pull the Starter Cord: Give a firm, steady pull on the starter cord. If the engine doesn’t start right away, wait a few seconds before trying again to avoid flooding.
Check Performance Issues
After making certain your mower starts smoothly, the next step is to check how it performs during operation. Push your mower across your lawn and pay close attention to its power and responsiveness. If the engine runs unevenly, stalls, or hesitates, there might still be carburetor issues or other underlying problems.
Listen for unusual sounds, such as sputtering or popping, which can indicate fuel flow problems. Also, check if the mower maintains consistent speed and blade rotation. If it struggles on inclines or thick grass, the carburetor may need further adjustment or cleaning.
Address these issues promptly to avoid damage and ensure efficient mowing. Testing performance thoroughly after cleaning helps confirm your work was effective and your mower is ready for regular use.
Frequently Asked Questions
How Often Should I Clean My Push Mower Carburetor?
You should clean your push mower carburetor at least once every season or after 25 hours of use.
If you notice performance issues, don’t wait—clean it sooner to keep your mower running smoothly.
Can I Use Carburetor Cleaner Spray Instead of Disassembling?
You can use carburetor cleaner spray, but don’t expect miracles. Sometimes it’s enough for minor clogs, but if your mower’s still struggling, you’ll have to disassemble to get deeper grime out and truly fix it.
What Type of Fuel Is Best for My Push Mower?
You’ll want to use fresh, unleaded gasoline with an octane rating of 87 or higher. Avoid ethanol blends above 10%, as they can damage your mower’s engine over time and cause starting or performance issues.
How Do I Store My Mower to Prevent Carburetor Issues?
Think of your mower like a car parked for winter; you don’t leave gas in the tank or carburetor. You’ll want to drain fuel or add stabilizer, clean the carburetor, and store it in a dry, covered spot to prevent issues.
Can a Dirty Air Filter Affect Carburetor Performance?
Yes, a dirty air filter can restrict airflow, making your carburetor work harder and causing poor engine performance.
You’ll want to clean or replace the filter regularly to keep your mower running smoothly and avoid carburetor problems.
Conclusion
Cleaning your push mower carburetor might seem like a messy, tedious chore, but it’s the difference between frustration and smooth mowing. While this task can feel overwhelming, the reward is a mower that runs like new, saving you time and money.
Don’t let a clogged carburetor slow you down—embrace the challenge, and you’ll enjoy the satisfying hum of a well-tuned engine. Proper maintenance, including cleaning your push mower carburetor, ensures efficient performance and extends the life of your equipment.
With these 10 steps to clean your push mower carburetor, yard work becomes a breeze instead of a burden. Take control of your mower’s performance and experience the difference a clean carburetor can make.